This is a place where friends of all ages can gather to create, explore, discover, inquire and share creative projects using a variety of tools and materials including Cricut and Close To My Heart resources.
New Card Design by Kimberly Bower using November SOTM and Tis The Season papers
November SOTM Blog Hop - Seasonal Trees
Welcome to our Stamp of the Month Blog Hop. I'm so glad you're here! If you're here from Melissa Robinson's blog, you're on the right path. This hop is a great big circle so you can start here and work your way around. When you get back to me you'll know that you've seen all of the creative ideas offered through this month's blog hop. There are 19 participating consultants so you're bound to be inspired by the time you complete the hop. If you'd like to see the full list, you can find that on Melinda's blog: If You Bling It.
This month we are featuring November's Stamp of the Month: Seasonal Trees.
If you love this stamp set, you will want to be sure to purchase it this month as it is only available during the month of November. Once you add $50 of qualifying products to your shopping cart you will see an option below the cart to add this special stamp for only $5.00.
Here's a closer look at my card design:
I hope you enjoy all of the design elements. Which part is your favorite? If you have any questions on my card design, please ask in the comments. I will answer each one. Your next stop along this hop is Darlys Recker's blog so hop on over and see what wonderful creation she has for you today.
Stay creative and continue to share kindness along the way,
Kimberly
New Shaker Card design by
Kimberly Bower featuring
Holiday Sparkle Cut Above Card Kit
Holiday Sparkle - CTMH Technique Blog Hop
Welcome to our Holiday Sparkle and Seasons of Joy Blog Hop. I'm so glad you're here! If you're here from Melinda Everitt's blog, you're on the right path. This hop is a great big circle so you can start here and work your way around. When you get back to me you'll know that you've seen all of the creative ideas offered through this month's blog hop. There are 14 participating consultants so you're bound to be inspired by the time you complete the hop. You can continue the hop by clicking on the links provided in each post. Should you get lost along the way, there is a list of participants here.
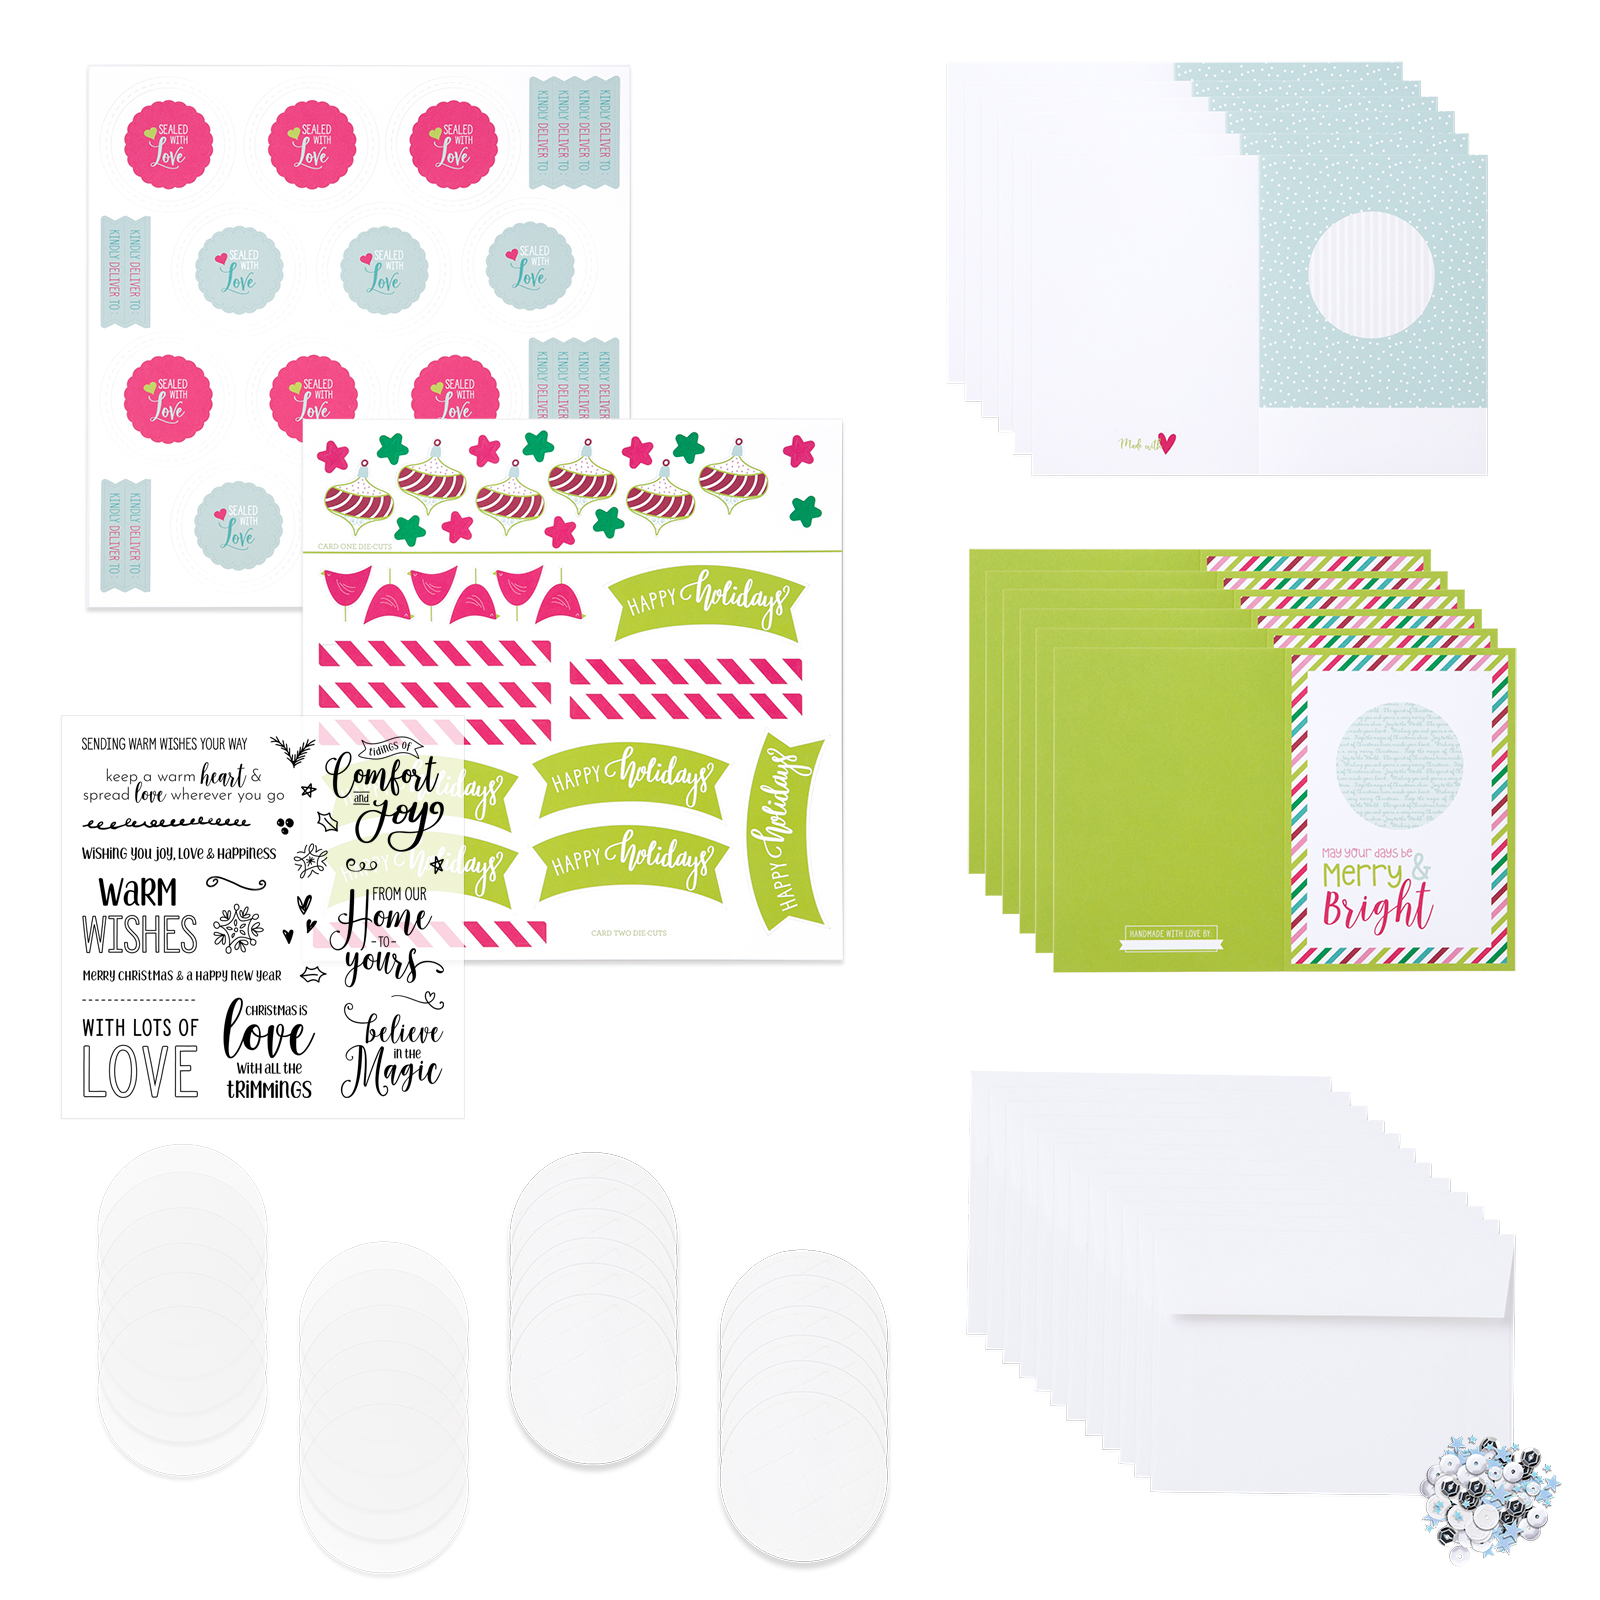
This blog is showcasing CTMH's Holiday Sparkle and Seasons of Joy Cricut Collection. I selected to feature our Holiday Sparkle Cut Above Card Kit. Here's a look at the stamp set and bundle:
My design showcases ways to personalize your design beyond the holidays. I want to assure you that if you purchase this kit and later discover you have purchased too many holiday cards, there are so many fabulous uses for shaker card bases beyond the holidays. Here's how to make my version of the Holiday Sparkle card:
Shaker Assembly:
1) Select a photo to feature in the shaker portion of your card.
2) Use the Thin Cuts: Shaker Window & Confetti and your Cuttlebug or other die-cutting machine. Cut the photo using the 3" circle. Cut heart-shaped confetti out of other portions of the photo that will bring the colors of the photo into your shaker. You can either use one of the ring stickers from the kit for the top of your shaker, or use another portion of the photo that was cut away like I did in my design.
3) Glue your photo on top of the circle on your card base. I knew I was adding shells to my shaker card and didn't want them to damage the photo so I used two acetate circles. I put one acetate circle above the photo but beneath the shaker filling. The second acetate circle is above the Shaker Window Foam (which can also be purchased separately from the kit, if desired).
4) Attach the Shaker Window Foam. I used a double layer of foam to accommodate the size of the shells I added to my design. Use the anti-static pouch around the inside edges of the foam and the base of your shaker window to minimize any static inside your shaker window.
5) Add the silver loose sequins, the heart confetti, a few small shells and a bit of beach sand (if desired) into the shaker 'pool'.
6) Remove the film from the clear acetate. Attach the clear acetate to the top of your foam ring.
7) Using Liquid Glass, attach the cover ring of your shaker, or use one of the stickers in your Cut Above Kit.
Card assembly:
1) I wrapped some twine around the outside of the shaker two times and then tied a knot.
2) I used the Decorative Thin Cuts and cut two tassels out of Pomegranate cardstock. I rolled the tassels with my quilling tool, adding small dots of glue as I went. I slipped the twine on each end through the top ring of each tassel. I added the teal and heart charms and knotted the twine. Finally, I tied a bow and trimmed the ends.
3) I used the back of the punch out greeting and the stamp that came in the bundle to stamp the sentiment on my card in Lagoon ink. I used the mini hearts from the same stamp set and stamped them in random places on the strip of cardstock around the sentiment.
4) Attach a 1.5"x5" strip of lagoon across the bottom of the card.
6) Attach sentiment using foam dots to add dimension.
Enjoy!
I would love it if you'd share your thoughts in a comment before continuing with our hop. For a detailed list of products used, please scroll past my signature line. Your next stop along this hop is Alyson Mayo's blog so hop on over and see what wonderful creation she has for you today.
Stay creative and continue to share kindness along the way,
Tweezers (to place small pieces/embellishments on card)
Want to make this? Let's go shopping! Want help with assembly? Let's do a Facebook Live! Just let me know.
If you are not already working with a consultant, I'd be honored to earn your business. If you'd like to enjoy the added privileges of being a consultant, I can show you how. Check out the labeled tabs for more details. You can also contact me via comment or email.
New Card Design by Kimberly Bower
featuring Boutique Scrapbooking stamp,
Texture Paste, and Silver Tinsel
Embossing Powder
Paste-fully Creative - CTMH Technique Blog Hop
Paste-fully Creative - CTMH Technique Blog Hop
Welcome to our monthly Technique Blog Hop. I'm so glad you're here! If you're here from Darlys Recker's blog, you're on the right path. This hop is a great big circle so you can start here and work your way around. When you get back to me you'll know that you've seen all of the creative ideas offered through this month's blog hop. There are 17 participating consultants so you're bound to be inspired by the time you complete the hop. You can continue the hop by clicking on the links provided in each post. If you'd like to see the full participant list, you can find that on Melissa's blog, My Heartfelt Sentiments.
I would love it if you'd share your thoughts in a comment before continuing with our hop. For a detailed list of products used, please scroll past my signature line. Your next stop along this hop is Catherine Nowak's blog so hop on over and see what wonderful creation she has for you today.
Stay creative and continue to share kindness along the way,
Kimberly
Want to make this? Let's go shopping! Want help with assembly? Let's do a Facebook Live! Just let me know.
If you are not already working with a consultant, I'd be honored to earn your business. If you'd like to enjoy the added privileges of being a consultant, I can show you how. Check out the labeled tabs for more details. You can also contact me via comment or email.
New A2 Card Design by
Kimberly Bower using September
SOTM and Grateful Heart and
Seasons Mix-In paper packs
Welcome to our Stamp of the Month Blog Hop. I'm so glad you're here! If you're here from Alyson Mayo's blog, you're on the right path. This hop is a great big circle so you can start here and work your way around. When you get back to me you'll know that you've seen all of the creative ideas offered through this month's blog hop. There are 23 participating consultants so you're bound to be inspired by the time you complete the hop. If you'd like to see the full list, you can find that on Melinda's blog: If You Bling It.
This month we are featuring October's Stamp of the Month: Thanks & Giving.
If you love this stamp set, you will want to be sure to purchase it this month as it is only available during the month of October. Once you add $50 of qualifying products to your shopping cart you will see an option below the cart to add this special stamp for only $5.00.
Here's a closer look at my card design:
I cut the stamp 'HOME' apart so I could position the letters on a saffron circle that would fit within the floral wreath stamp. I used our Gold Shimmer Brush on the inner circle. I used our Princess Gold Embossing Powder for the rest of the phrase 'SWEET HOME' under the wreath after preparing the area with our anti-static pouch. I used our Thin Cuts for interest on the roof edge and raised the lower edge with 3D Foam Tape.
I fussy cut pumpkins for the front porch from a Grateful Heart PML card. I used the tail end of the arrow on the stamp set as a stem and leaves for my flower. I stamped the flower in nectarine and the border of the flower in pomegranate. I used my gold Cricut Metallic Pen around the edges and as a second border around the flower. I used Clear Super Fine Embossing Powder on the pumpkins to add some shine. I used a gold pearl dot for the doorknob. The Sapphire triangle in the upper right hand corner represents the sky and the polka-dotted fern rectangle represents the lawn.
Finally, here's a peek inside:
I hope you enjoyed all of the design elements. Which part is your favorite? If you have any questions on my card design, please ask in the comments. I will answer each one. For a detailed listing of the products used, just scroll past my signature line. Your next stop along this hop is Haley Dyer's blog so hop on over and see what wonderful creation she has for you today.
Stay creative and continue to share kindness along the way,
Kimberly
Want to make this card? Let's go shopping! Want help with assembly? Let's do a Facebook Live! Just let me know.
If you are not already working with a consultant, I'd be honored to earn your business. If you'd like to enjoy the added privileges of being a consultant, I can show you how. Check out the labeled tabs for more details. You can also contact me via comment or email.
Welcome to our monthly Technique Blog Hop. I'm so glad you're here! If you're here from Darlys Recker's blog, you're on the right path. This hop is a great big circle so you can start here and work your way around. When you get back to me you'll know that you've seen all of the creative ideas offered through this month's blog hop. There are 13 participating consultants so you're bound to be inspired by the time you complete the hop. You can continue the hop by clicking on the links provided in each post. Should you get lost along the way, there is a list of participants below.
This month we are showcasing products found in our brand new 2018 Holiday Expressions catalog that give the appearance of, or contain actual, stitching. There is a 'stitched' alphabet stamp set, 'stitched' thin cuts in different shapes, thread for use in actual stitching, and of course, you can add the look of stitching with a journaling pen. You can view the entire catalog online here. Also, if you place an order of any size, Close To My Heart will send you a catalog for free. I love using the photos in the catalog to inspire my own creations.
I decided to venture outside the box a little by creating a travel sewing kit that you could keep in your purse, overnight bag, or glove box. This would make a great 'thank you' gift for a friend and is small enough that you could tuck it into a card for mailing. You could also change it up a bit and turn it into a gift card holder. It'd be an easy swap. Here's a look at it open and a rear view too:
Here's how to make this travel sewing kit:
Cut one B&T (patterned paper): 4.5" x 9.5".
Score at 1.75", 4.5", 5.75", and 7".
Make valley folds at all score lines except for 5.75" score line. At this line, make a mountain fold.
Place sewing kit along 5.75" score line. Make a mark on each end of the sewing kit. Cut along the center area of this score line so sewing kit will slide into the opening.
Flip paper over. Use a strong double-sided adhesive like Duck to create a sealed edge between the score lines to the immediate right and immediate left of 5.75" score/cut line. This will prevent your sewing kit from falling out of the bottom of your travel kit.
Use a corner rounder on both corners closest to the 1.75" score line. This will be the top flap.
Cut one B&T (patterned paper): 2" x 7". This will be a band around your kit.
Score the band at 2" and 4.75". Make sure it fits around your kit.
Use adhesive to seal the two ends of band together.
Cut a saffron heart with the 2.5" Basic Heart Thin Cut.
Cut a light B&T heart with the 2.25" Stitched Heart Thin Cut.
Stamp "Sew thankful" sentiment. Stamp leaves and designs as desired on stitched heart using 'Grateful Heart - Cardmaking Stamp Set'. Add Bitty Sparkles, as desired.
Attached stitched heart to basic heart.
Attach double heart to cover the raw edge of the belly band.
Slide belly band over sewing kit.
Enjoy!
Whoa! Wait a minute! I had so much fun creating this travel sewing kit that I made another, slightly smaller version (4" wide instead of 4.5") substituting in our Boutique cardmaking stamp, papers and complements. Which one do you like better?
I would love it if you'd share your thoughts in a comment before continuing with our hop. For a detailed list of products used, please scroll past my signature line. Just a note: I was inspired by quite a few gift card holder designs on Pinterest, most of which were fairly similar in size and structure. Your next stop along this hop is Catherine Nowak's blog so hop on over and see what wonderful creation she has for you today.
Stay creative and continue to share kindness along the way,
Kimberly
Want to make this? Let's go shopping! Want help with assembly? Let's do a Facebook Live! Just let me know.
If you are not already working with a consultant, I'd be honored to earn your business. If you'd like to enjoy the added privileges of being a consultant, I can show you how. Check out the labeled tabs for more details. You can also contact me via comment or email.
New Card Design by Kimberly Bower
featuring Boutique and Grateful Heart Cardmaking
Stamp Sets and Grateful Heart Paper Packet
Blog Hop Featuring Close To My Heart
'2018 Holiday Expressions' New Products
Welcome to our New Product Blog Hop. I'm so glad you're here! If you're here from Haley Dyer's blog, you're on the right path. This hop is a great big circle so you can start here and work your way around. When you get back to me you'll know that you've seen all of the creative ideas offered through this month's blog hop. There are 20 participating consultants so you're bound to be inspired by the time you complete the hop. If you'd like to see the full list, you can find that on Melinda's blog: If You Bling It.
This month we are showcasing products found in our brand new 2018 Holiday Expressions catalog. You can view the entire catalog online here. Also, if you place an order of any size, Close To My Heart will send you a catalog for free. I love using the photos in the catalog to inspire my own creations.
My card design features our Grateful Heart - Cardmaking and Boutique - Cardmaking stamp sets, and our Grateful Heart Paper Packet. This paper packet features the following colors: Pomegranate, Sapphire, Glacier, New England Ivy, Fern,Saffron, Goldrush, Espresso, Mink, and White Daisy. Here's a look at these three items:
I am in love with our Grateful Heart butterfly. I took creative license and strayed from the natural colors of the Monarch butterfly to create a butterfly that made my heart happy. I inked the butterfly in Archival Black and the sentiment, 'you make my heart happy' in Sapphire. I used 'Thin Cuts - Stitched Hearts' for the three hearts on the front and one on the inside of the card. There is a tiny banner in the lower left-hand corner that uses the woodgrain from our Seasons Mix-In Paper Packet. I embellished my card with three Gold Glitter Gems and added sparkle to the butterfly and the hearts with our clear Shimmer Brush. If you got to paint a butterfly, what colors would you choose?
New Card Design by Kimberly Bower
featuring Boutique and Grateful Heart Cardmaking
Stamp Sets and Grateful Heart Paper Packet
I would love it if you'd share your thoughts in a comment before continuing with our hop. For a detailed list of products used, please scroll past my signature line. Your next stop along this hop is Miss Carrie's Creations so hop on over and see what wonderful creation she has for you today.
Stay creative and continue to share kindness along the way,
Kimberly
Want to make this card? Let's go shopping! Want help with assembly? Let's do a Facebook Live! Just let me know.
If you are not already working with a consultant, I'd be honored to earn your business. If you'd like to enjoy the added privileges of being a consultant, I can show you how. Check out the labeled tabs for more details. You can also contact me via comment or email.
All-Occasion Inside Shadow Box Card
made by Kimberly Bower using
September SOTM and Boutique papers
Blog Hop: September CTMH Stamp of the Month - Just Treats
Welcome to our Stamp of the Month Blog Hop. I'm so glad you're here! If you're here from Haley Dyer's blog, you're on the right path. This hop is a great big circle so you can start here and work your way around. When you get back to me you'll know that you've seen all of the creative ideas offered through this month's blog hop. There are 20 participating consultants so you're bound to be inspired by the time you complete the hop. If you'd like to see the full list, you can find that on Melinda's blog: If You Bling It.
This month we are featuring September SOTM: Just Treats (S1808). This stamp comes with 22 images celebrating multiple Fall holidays.
If you love this stamp set, you will want to be sure to purchase it this month as it is only available during the month of September. Once you add $50 of qualifying products to your shopping cart you will see an option below the cart to add this special stamp for only $5.00.
Measurements and supplies
for card front
CTMH Exclusive My Acrylix Inks used
View of card interior (inside shadow box)
View of card when open revealing
inside shadow box
Card folds flat and fits in
standard A2 envelope for mailing
To make the card front, you'll need pieces cut as follows:
Saffron: 5.5" x 4.25" (cut 1), 2.75" x 3.25" (cut 1)
Glacier: 2.5" x 3" (cut 1), 4" x 1.25" (cut 1)
Boutique B&T (polka dots): 4" x 2" (cut 2)
Gold Glitter Trim: 4" (cut 1)
On the Saffron base, adhere the Boutique B&T and Glacier rectangles as seen in photo. Adhere the Gold Glitter Trim along the bottom edge of the Glacier strip. Stamp the sentiment, 'Thankful for sweet friends like you', on the Glacier rectangle. Adhere this to the smaller Saffron rectangle. Attach this piece at an angle on top of your base (see photo). Stamp the candy pieces (lemon center) and the coffee cup on White Daisy cardstock. I used Toffee for drink color inside cup and Saffron for design on cup exterior. Cut. Use Archival Black if you intend to use water with the watercolor pencils after coloring the cup and/or candies.
View of alternate inside of card
using White Daisy cardstock for
box rather than Glacier
To make the 'box' for the card, you need:
1) Blank A2 CTMH White Daisy Card: Cut off 0.5" from one end which will become the back of the card,
2) Glacier cardstock: 5.5" x 8.5", scored at 0.5", 4.25", and 4.75", then cut a sliver off of the end that has the 0.5" scoring,
3) Oval Thin Cuts: Place where desired on the section closest to the 0.5" score line and cut out using Cuttlebug, and
4) Linen: 3.75" x 5" for background inside shadow box.
Stamp the woodgrain image from 'Grateful Heart - Cardmaking' onto the Linen rectangle about 2.5" up from bottom (depending on size and placement of your Oval Thin Cut). Use Thin 3-D Foam Dot to place fussy-cut cup onto woodgrain 'table'. Stamp steam swirls on top of cup and onto background (see photo). Using Duck Easy Stick tape runner, tape the 0.5" seam of the Glacier 'box'. Align to fold line on interior of White Daisy Card. Fold and press card closed to adhere. Use Duck Easy Stick tape runner along both edges of the inside back of the Glacier 'box'. Align to outside back of White Daisy card base. Press to adhere. When closed, the card will be the standard A2 card size and can be mailed in the envelope provided in the CTMH bulk card/envelope package.
If you need further instructions on putting this card together, I'd be happy to assist.
I was inspired by the Inside Shadow Box Cards video instructions by Jennifer McGuire Inks to create the inside shadow box. I changed up the instructions a little to use our card base, but you could easily use White Daisy cardstock instead. I made one using Glacier cardstock and another using White Daisy cardstock. Which do you like better?
Want to make this card? Let's go shopping! Want help with assembly? Let's do a Facebook Live! Just let me know.
If you are not already working with a consultant, I'd be honored to earn your business. If you'd like to enjoy the added privileges of being a consultant, I can show you how. Check out the labeled tabs for more details. You can also contact me via comment or email.
Your next stop along this hop is Katy Taylor's blog so hop on over and see what wonderful creation she has for you today.
Stay creative and continue to share kindness along the way,
Kimberly